Knowing the parts of an airbrush isn’t just for technicians or experienced artists; understanding what each piece does helps you paint better, troubleshoot quickly, and know exactly which replacement part you need when something goes wrong.
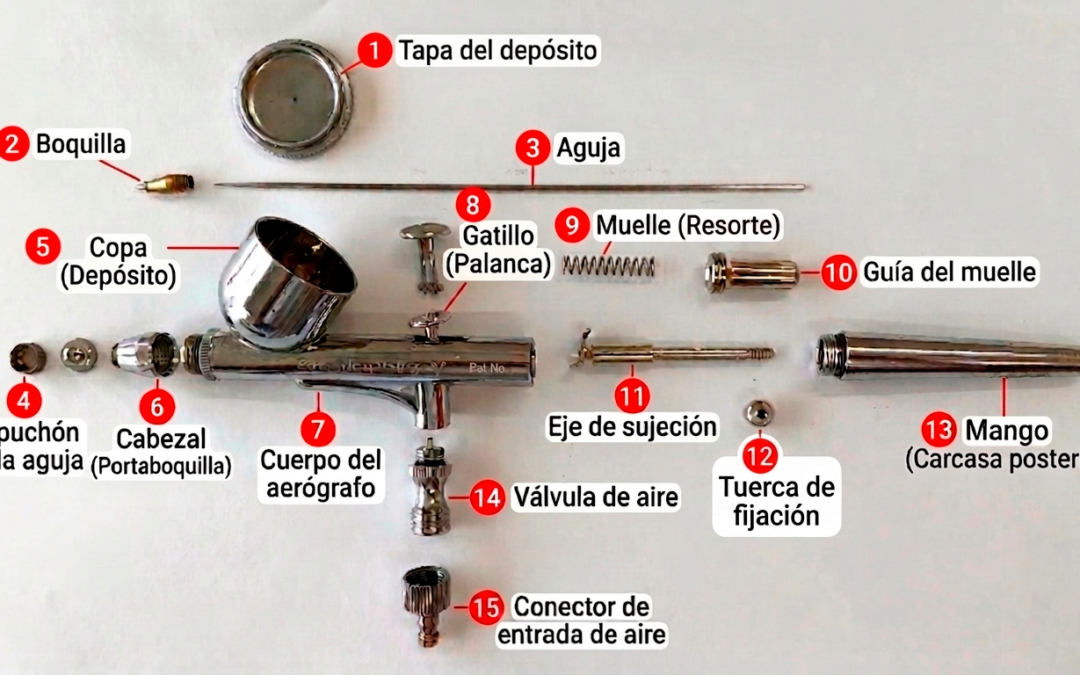
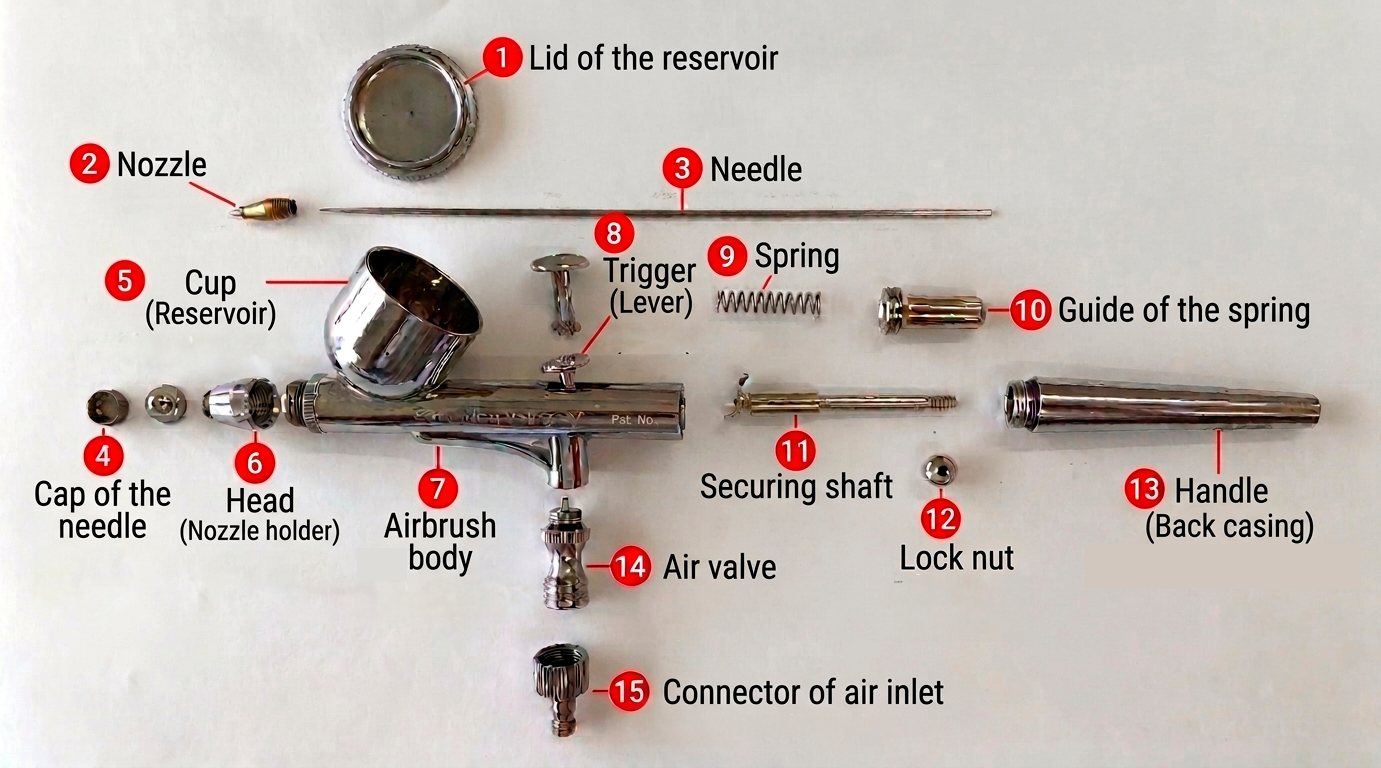
In this guide, you’ll find a complete diagram showing the 15 main parts of a double-action airbrush, allowing you to get to know each component quickly and easily.
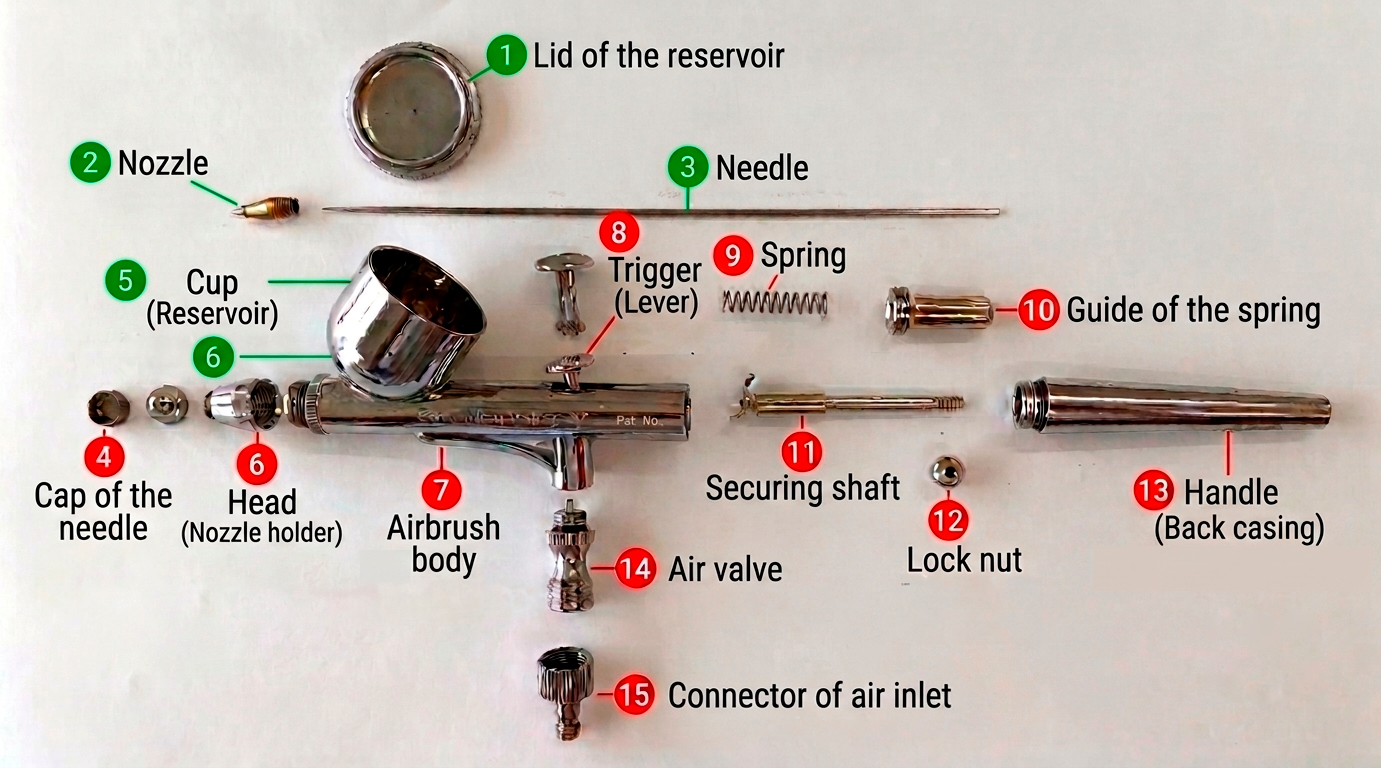
1. Cup lid — Covers the cup when not in use to prevent the paint from drying out or spilling. For long jobs, it is best to remove it so a film does not form on the paint’s surface.
2. Nozzle — The most delicate part of the airbrush. It is the opening through which the paint and air mixture exits. The nozzle diameter—0.2 mm, 0.3 mm, or 0.5 mm—determines the minimum line thickness and the type of work the airbrush is suited for.
3. Needle — Controls paint flow by moving backward inside the nozzle. It is the part most prone to wear; a bent or damaged needle tip causes irregular lines and splattering. If you experience spraying issues, the needle is the first thing to check. View our replacement needles
5. Cup / Reservoir — Holds the ready-to-use paint. Gravity-feed airbrushes, like the one in the diagram, have the cup on top; paint flows down to the nozzle via gravity, allowing for work at lower pressures and with greater precision.
6. Head / Nozzle cap — Houses and secures the nozzle in place. It screws onto the airbrush body and must be loosened to change or clean the nozzle.
4. Needle cap — Protects the needle tip and directs airflow around the nozzle. Some models feature cutaway caps that offer better visibility of the work area.
The control mechanism — the parts that regulate the stroke
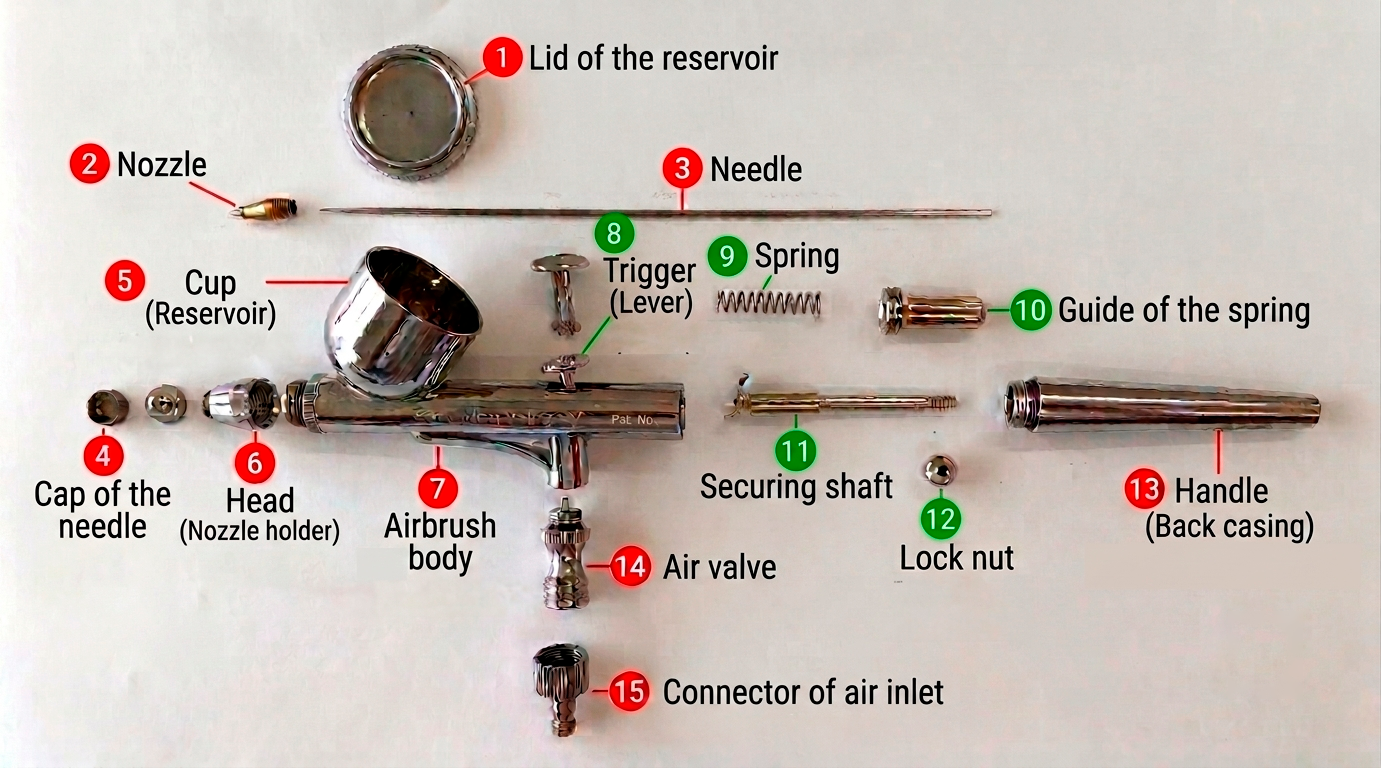
8. Trigger / Lever — The central control element of the double-action airbrush. Pressing down opens the airflow; pulling back increases the paint flow. Coordinating these two movements is the foundation of airbrushing technique.
9. Spring — Returns the trigger to its resting position when released. A worn-out spring results in inconsistent trigger response—if you notice the trigger doesn’t return smoothly to its position, the spring may need replacing.
10. Spring guide — Keeps the spring aligned and guides the movement of the needle shaft. It is a small but critical part for precise trigger operation.
11. Connecting shaft — Connects the trigger to the needle. When the trigger is pulled back, the connecting shaft pushes the needle back, opening the paint flow.
12. Locking nut — Locks the needle’s position within the airbrush. On some models, this nut allows you to adjust the needle’s maximum travel—thereby limiting the maximum paint flow, which is useful for fine detail work.
The body — the main structure
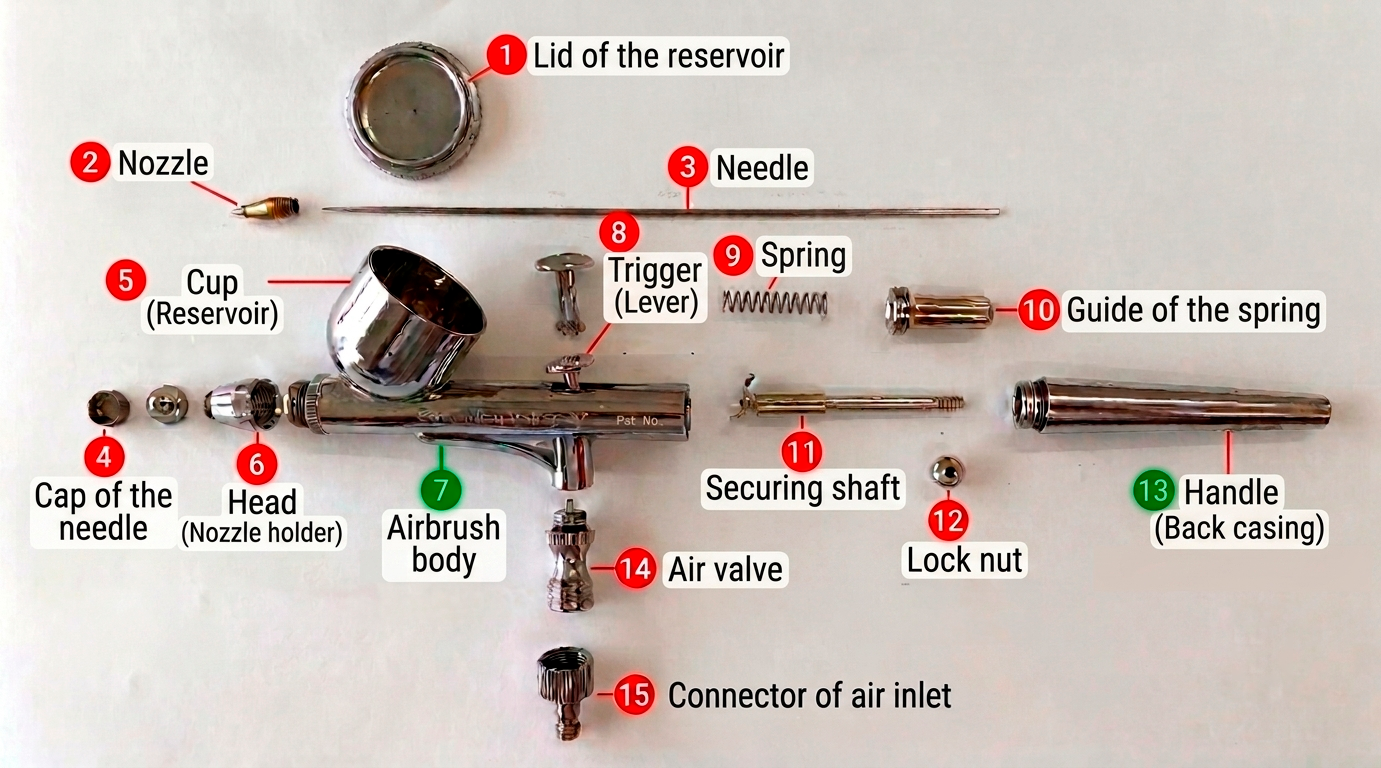
7. Airbrush body — The central part that houses all internal mechanisms and onto which the other components are assembled. The body’s weight and balance directly influence fatigue during long work sessions.
13. Handle / Rear casing — The part held in the hand. It houses the spring and guide, and encloses the rear assembly of the airbrush. On many models, the handle is interchangeable between different configurations within the same product line.
The air system — the parts that manage pressure
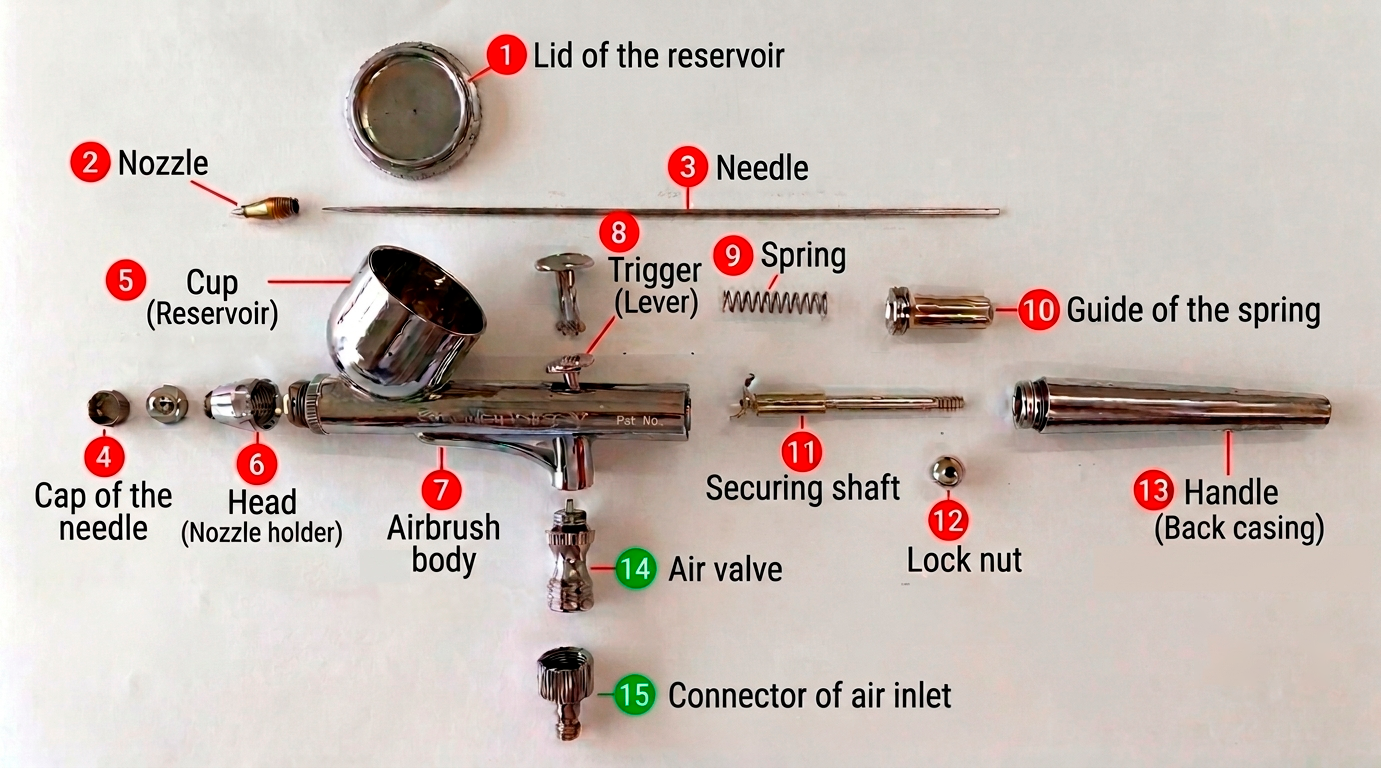
14. Air valve — Opens the airflow from the compressor when the trigger is pressed down. This valve produces the airbrush’s characteristic sound upon activation. If air flows continuously without the trigger being pressed, the valve may have a worn seal.
15. Air inlet connector — The connection point between the airbrush and the compressor hose. It typically features a standard 1/8 BSP thread, making it compatible with most compressors on the market.
Which parts wear out first?
The three parts subject to the most wear, in order of frequency, are the needle, the nozzle, and the air valve seals.
The needle gets damaged by improper cleaning—wiping it sideways causes the tip to bend microscopically, ruining the spray pattern.
The nozzle becomes clogged with dried paint if not cleaned immediately after each session.
The valve seals lose their elasticity over time and begin to allow air to leak continuously.
Frequently Asked Questions About Airbrush Parts
How many parts does an airbrush have?
A double-action airbrush consists of between 12 and 20 parts, depending on the model. The 15 main parts are shown in this guide’s diagram; the most critical for daily operation are the needle, nozzle, trigger, and air valve.
What is the difference between the nozzle and the needle?
The needle is a metal rod that regulates paint flow by moving inside the nozzle. The nozzle is the fixed opening through which the mixture exits. They always work in tandem—if you replace one, it is advisable to check the other as well.
Can I use replacement parts from other brands?
It depends on the model. Richpen and GSI Creos airbrushes use brand-specific parts; mixing components from different brands can affect stroke precision. It is always best to use genuine replacement parts.
How often should the needle be replaced?
It depends on usage and maintenance. With proper cleaning after every session, a needle can last for years. If you notice bubbles in the stroke, paint splattering, or a loss of uniformity, the needle is the first thing you should check.